
DIY Closet Shelves
Purposeful shelving makes a world of difference in the sustainable organization of your home. Here’s my budget-friendly DIY version!

How our pantry is set up. These Sterilite Ultra Bins are my favorite!
My office closet, back when I had much less stuff. I’ll need to get new pics!

My side of our bedroom closet, back when I wore much brighter colors!
Goodbye, worthless wire shelves!
Redoing the closets is one of the first projects I take on in a new space. I gleefully rip out those worthless single wire shelves and install custom-fit, purposeful shelving to maximize the storage potential of that closet. This will help you unpack, get organized, and STAY organized! The shelving I use is adjustable in height, so you can reconfigure it as your needs change. So, let’s get into it!
Approach 1 - Boxed Systems:
For those wanting something more turn-key, my favorite pre-made closet system is Easy Track. They’re suspended on a single bar hung horizontally across the back of your closet and offer several modular sizes to fit your space. Plus they also offer a wide variety of accessories such as drawers. The assembly is simple with clear instructions, but you will need a level, drill, and special drywall bolts (which they include in the packages).
Check out their website for more info on their systems, but for the rest of this blog, I will be focusing on my DIY approach.
Approach 2 - DIY:
The drawback of a boxed closet system is the price and limited customization of the width of your closet. So instead I use melamine shelves from Home Depot to build out our closets. This system sits on the ground, which makes them renter-friendly and more accessible for the not-so-handy DIYer (if you have Home Depot cut your pieces for you). These can be found in the lumber section of the store, not in the “closet” section.
White Melamine Pre-Drilled Wood Panel
I call these “towers” because they stand vertically at each end of your shelves
Around $30 for 8 feet
Around $25 for 8 feet
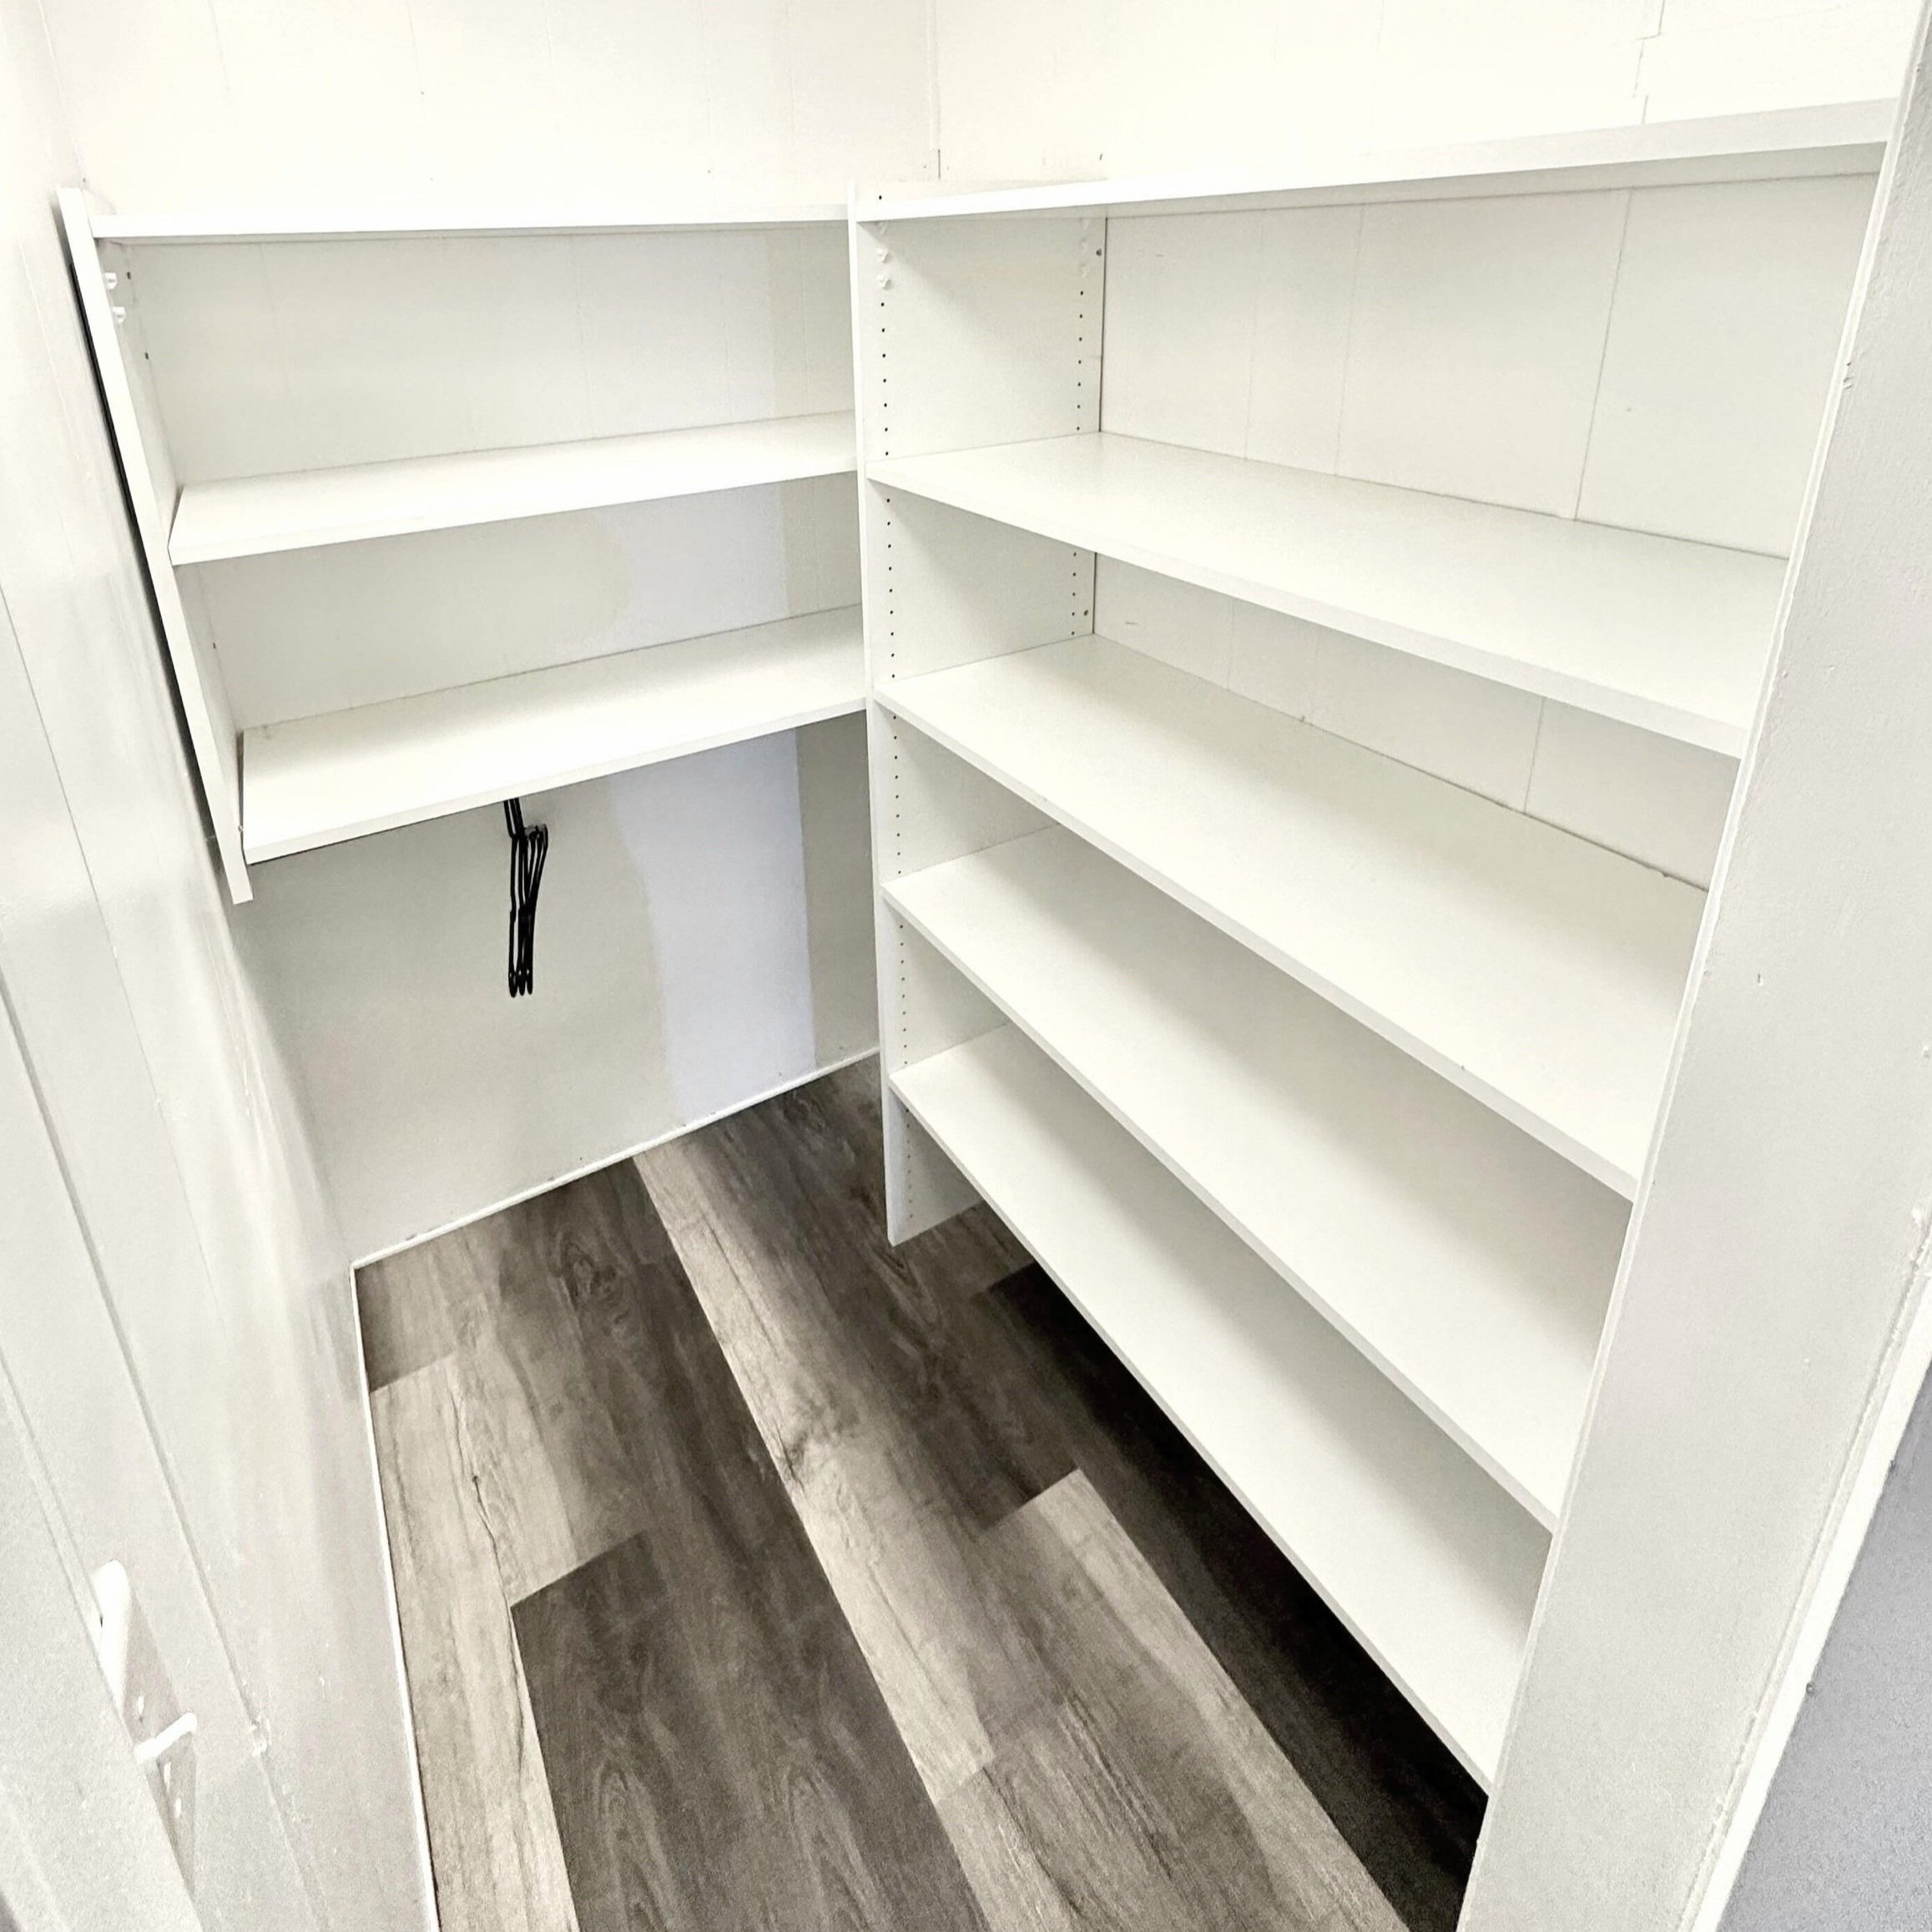
After
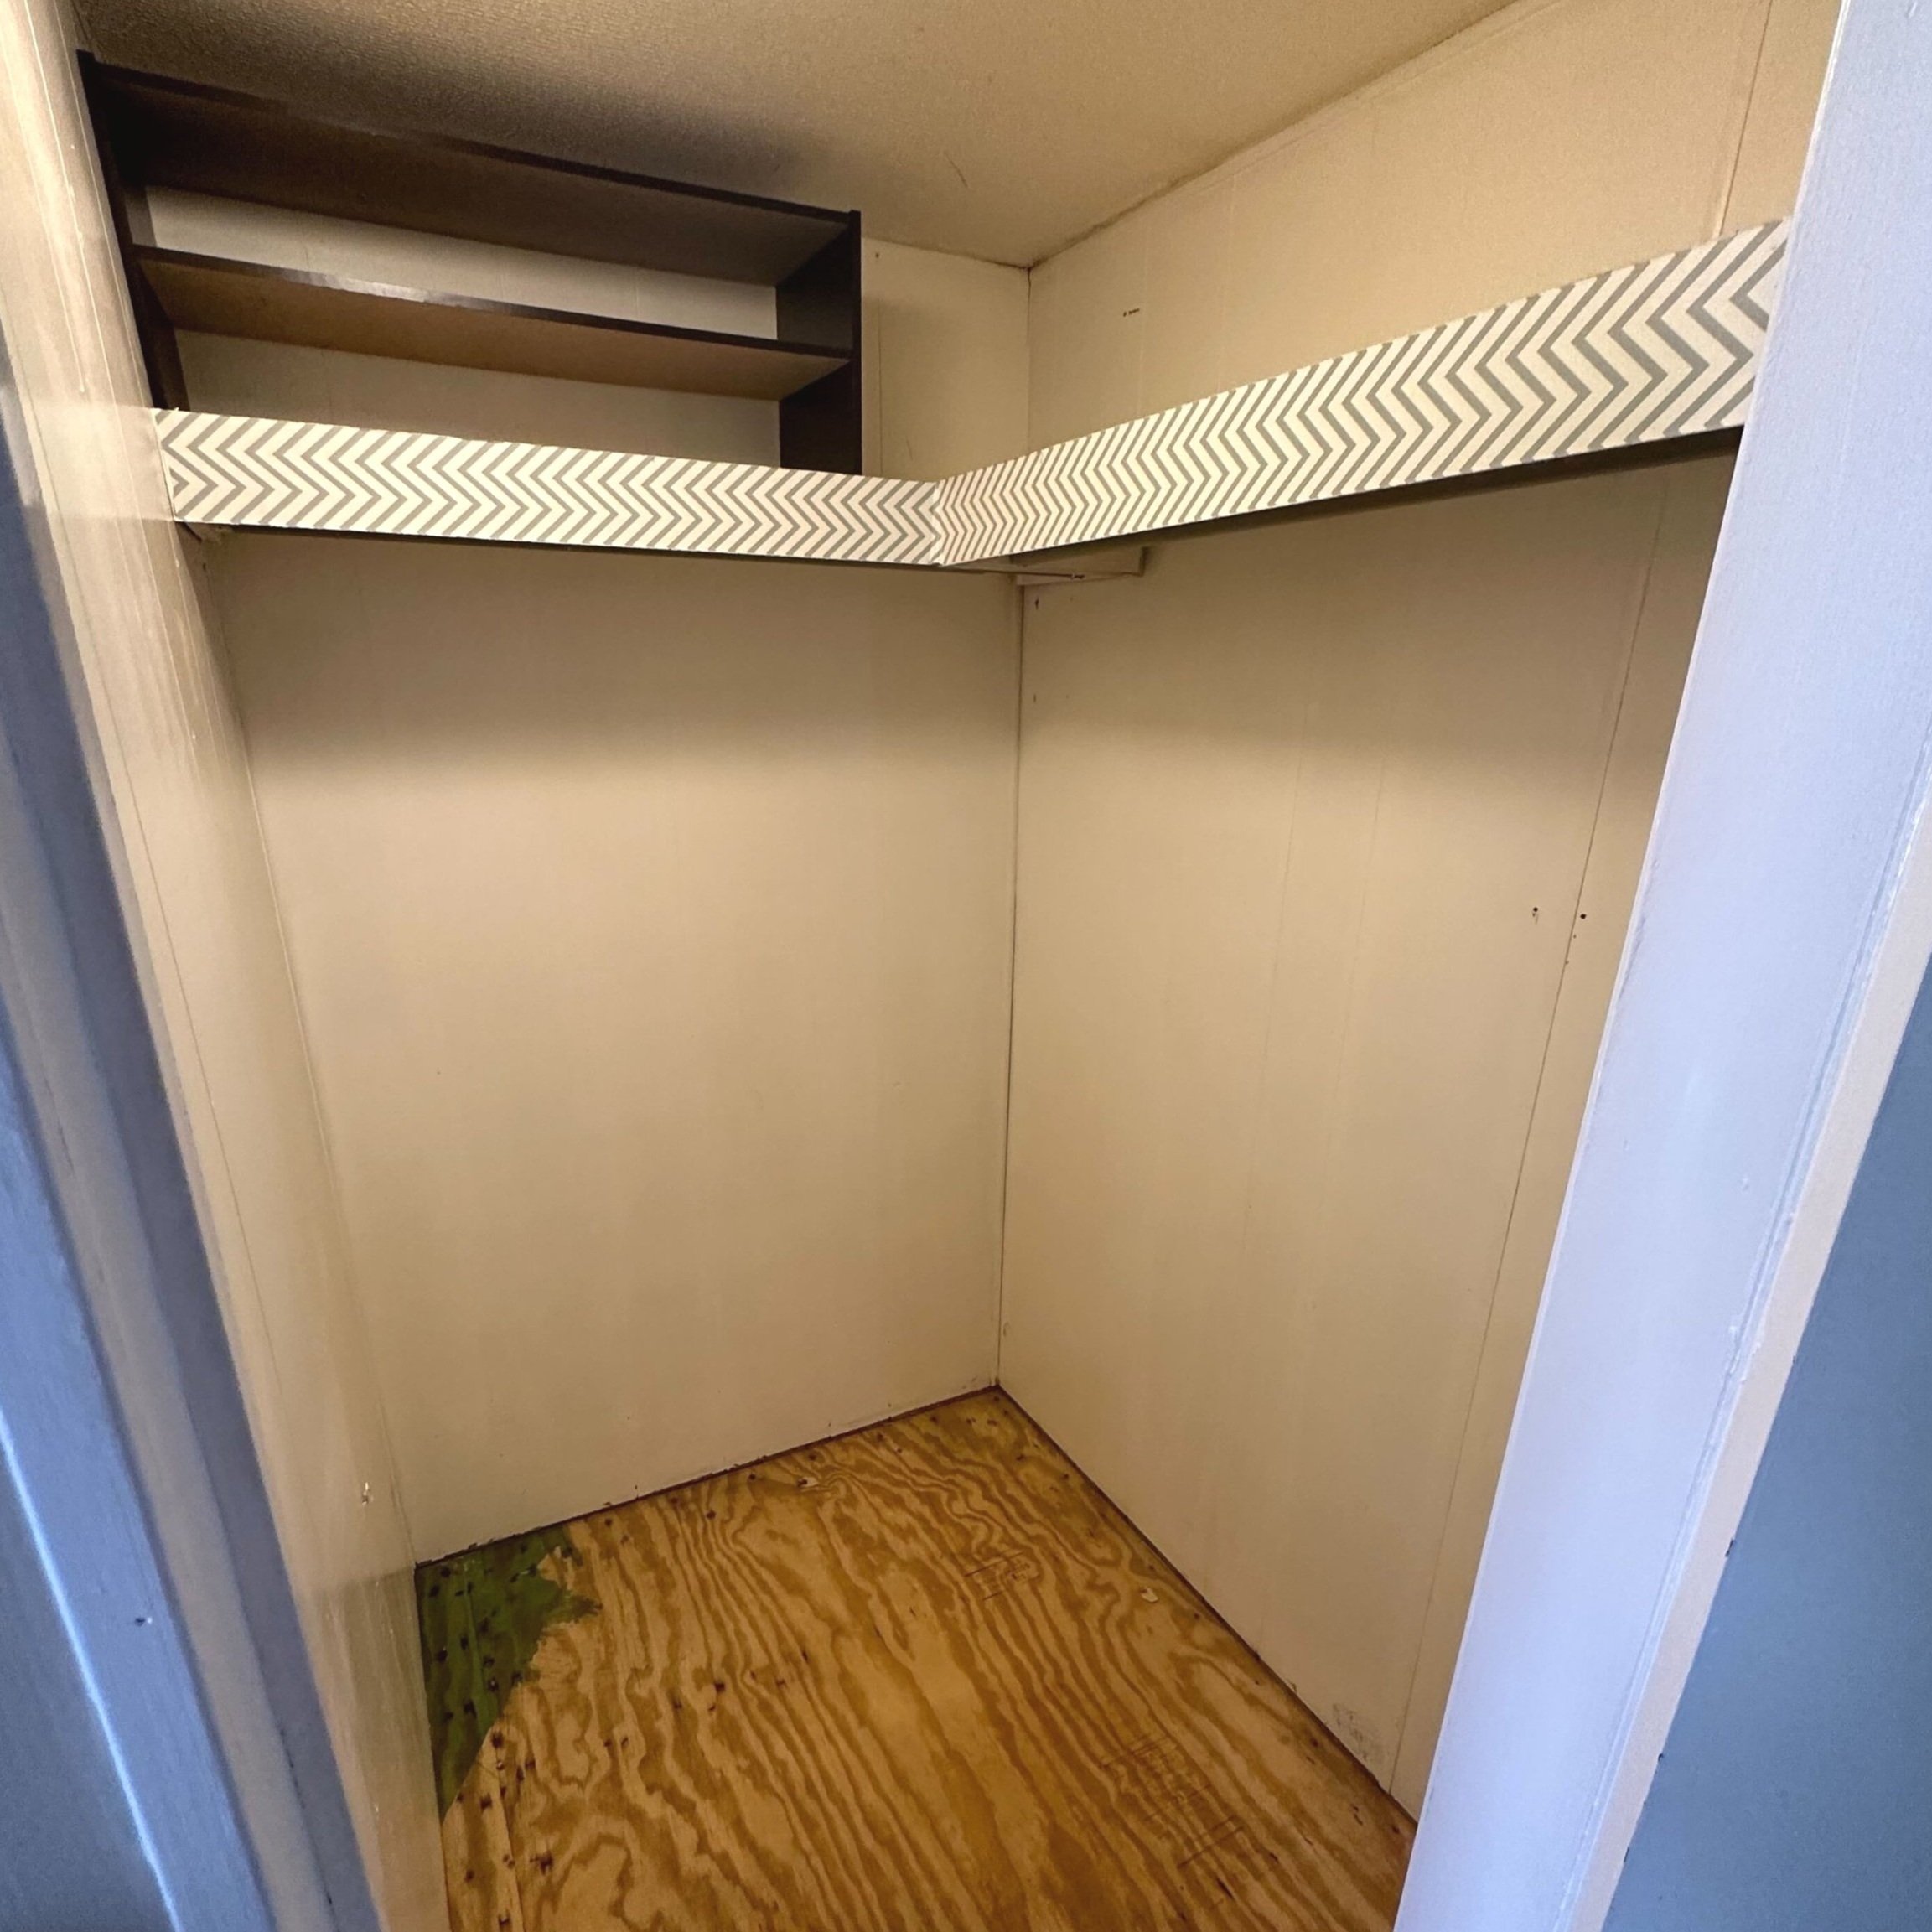
Before
For my brother’s 4’ x 5’ closet, I used:
2 towers, cut at 5.5 and 2.5 feet
4 eight-foot shelves. 3 cuts at 46.5” and 5 cuts at 42”
3 bags of shelf pins
1 adjustable closet rod
All in all, this structure would cost around $170. Using Easy Track, or other boxed closet systems, would have easily cost 2-3x that!
I got lucky with this one because I found two shelf boards with significant cosmetic damage, which Home Depot gave to me at a nice discount. Score! Plus I already had the closet rod, reused from the shelves we took out.
Planning Your Closet
Important Considerations:
Before you buy your supplies, it’s important to have a solid plan in place first to optimize every inch. Some items to consider:
What kinds of items will you be storing in the closet?
If you need hanging space, how much do you need?
Do you have baskets in mind? If so, what are their dimensions?
The Prep Work:
Remove any existing shelving or objects from your closet
Paint the closet if needed
I like to paint my closets pure white, which brightens up the space and doesn’t influence the colors of your clothing.
Sherwin Williams Emerald Acrylic Latex in Satin Finish is my all-time favorite paint. It has a smooth application, often only 1 coat is needed, and has incredible durability and washability. For ceilings I use the same paint but with a flat finish.
Accurately measure your space - width, depth, height
Plan out your towers
You will need a tower every 4 feet to best support the shelves and prevent bowing. You can do less than 4 feet, but not much more past 4 feet.
These towers come with pre-drilled holes, but only on one side. Depending on your needs, you can drill through the existing holes to create some on the other side so one tower can support shelves on each side.
Keep in mind the thickness of the tower panels when planning your space. The Home Depot ones are 3/4 inch thick
This system comes in two depths: 11.75” or 15.75”, and both are eight feet tall. I choose the deeper one whenever possible
I usually use a full tower on each side of my shelves and don’t need any cutting. But sometimes it makes more sense in the layout (or budget) to cut a tower down to use in two places.
Plan those cuts and make sure they get cut mirrored! As in have one tower with the holes facing you when getting cut, and the other with no holes facing you. This will ensure your holes end up level on either side of your tower.
Estimate the number of shelves you will need and what you need them cut at
Remember that the tower panels are 3/4 inch thick and you’ll need one on each side of your shelf (so 1.5 inches)
Take into account what you’ll be storing on the shelves or the height of the baskets
I like to plan for one to two extra shelves which always comes in handy someday
Supplies Needed:
Create your shopping list. Remember: measure twice, cut once!
X Towers
If needed, cut at Y inches (remember to do this mirrored so the holes line up when you set things up)
X Shelves cut at Y inches
X Shelf pins (4 per shelf)
2” Screws
I only use star drive screws now - no more pre-drilling or stripping heads! The box will come with a star bit too.
1 pack of wood shims
X Adjustable Closet Rods (if needed)
Other supplies needed:
Drill or impact driver with drill bits
I LOVE my Dewalt impact driver, which I got in a drill and impact driver set (I prefer to have both)
Here’s an inexpensive Ryobi drill or a drill and impact driver set
Level (optional, but helpful to have)
Utility knife (to cut down the wood shims if needed)
Pencil
Measuring Tape
Note: If you are not going to have Home Depot cut your pieces down, you will need a circular saw or sliding miter saw.
I use my 7.25” sliding miter saw, which doesn’t fully reach the full depth of the boards. So I cut as much as I can in one run, flip the board over and finish the rest of the cut.
Build Your Closet!
First, assemble a “box”. Two shelves will stay in a fixed position, which will give the structure some needed stability. I recommend having a helper for this part.
You will need two towers, two shelves, and 8 screws for this.
Lay your towers down on their side, and have a helper hold them steady.
From the pre-drilled side of the towers, drive screws into the top holes of each tower to make a hole that goes all the way through both sides (or use a 1/8” drill bit for that part). Back those screws out and drive them in from the non-pre-drilled hole side until the tip of the screw pokes through about 1/4 inch.
Working first with one tower and shelf, center the shelf into those screws that are poking out a bit. Remember to make sure the front of the shelf is flush with the front side of the tower. Drive the screws all the way into the shelf. Repeat on the other side of the shelf with the other tower. You should now have a box with no bottom.
Repeat step 2 with the other shelf toward the bottom of your tower. I usually do this at about 10-12 holes up from the bottom. You will now have a box with 4 sides.
Slide the box into place inside your closet.
Repeat steps 1-4, as needed, for any other towers to fit your closet space.
I recommend attaching your towers to the wall for added safety.
Optional: place a level on the top shelf of the box to determine if any areas need to we shimmed. If they do, slide the thin part of the shim in until the structure is level. Score any unused shim with a utility knife then snap off the rest.
In the holes of the tower closest to the back wall of your closet, drive screws in at the top, bottom, and middle of your tower. These should hit studs and will anchor your closet system into place.
Next, place shelf pins at your desired heights and add your shelves!
If using any closet rods, measure and mark where those should go. Remember to allow enough space for the depth of your hanger and the height of the hook. If your closet rod isn’t attaching to your towers but instead into drywall, you will likely need to use wall anchors. The ones linked are my favorite with the easiest installation.
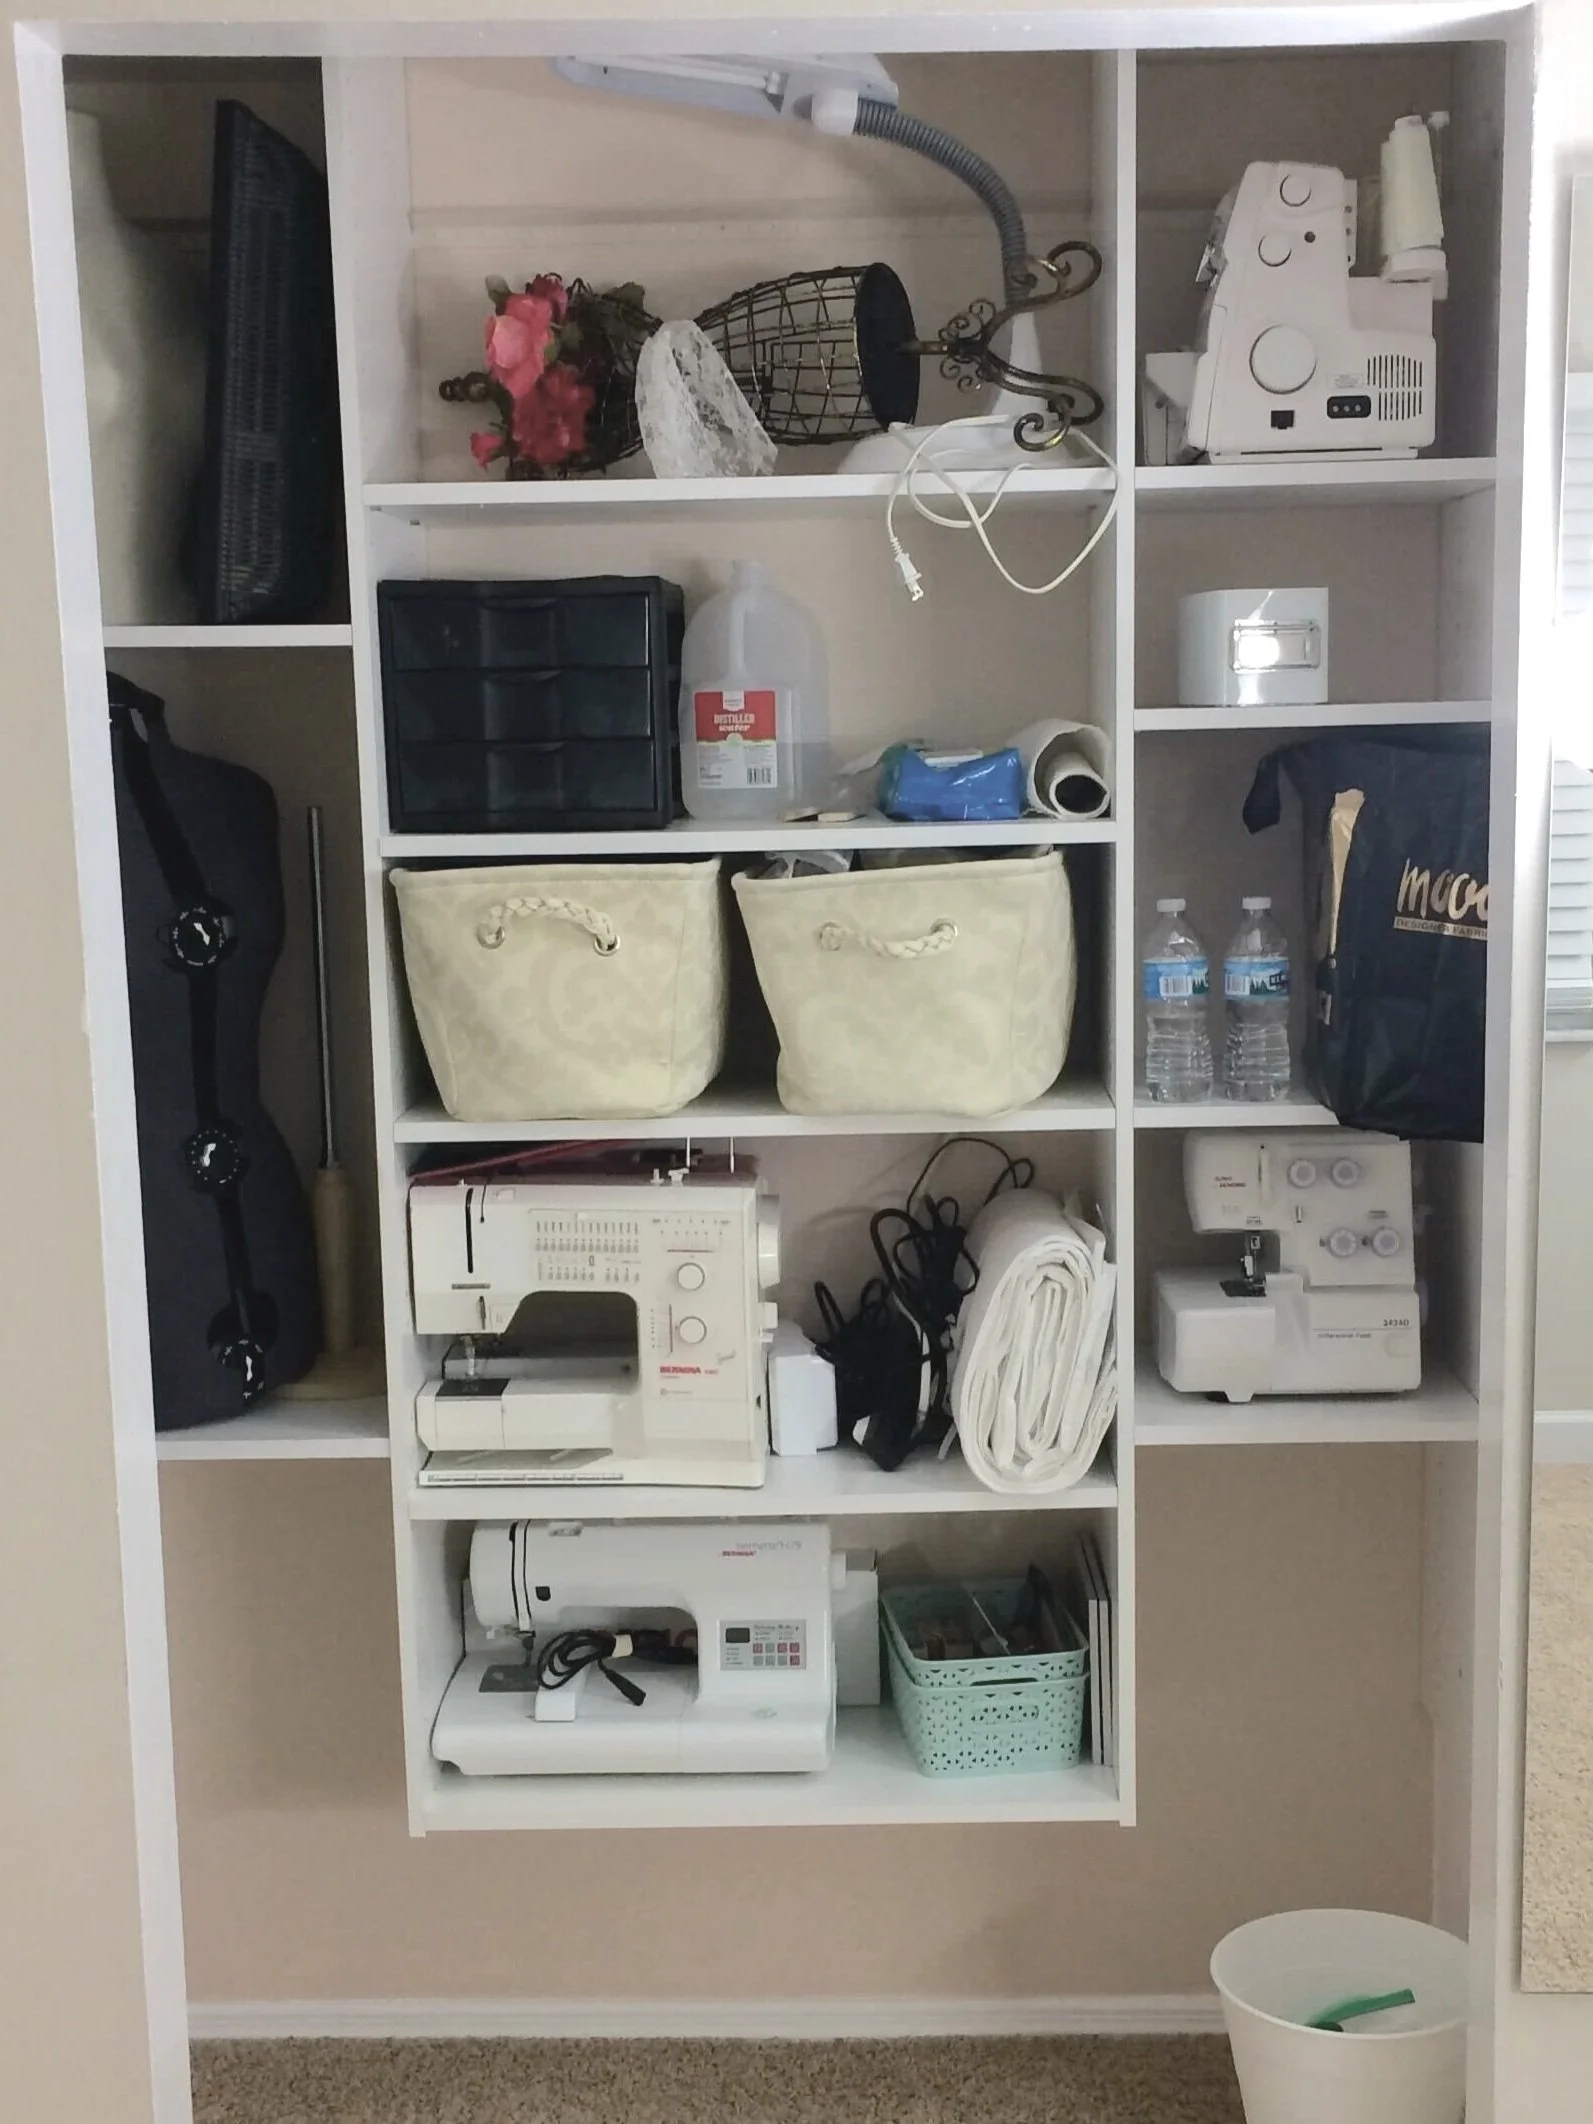
And there you have it! A beautiful, functional, purposeful closet that you will be so grateful for for years to come!
Get Organized
I love using baskets, all the baskets, in our closets. It helps give everything an assigned home so they stay organized. Target usually has a good variety of more affordable baskets, which is where my son’s are from. I highly recommend either picking a style that has been around for years so you can get more as needed, like the Sterilite Ultra Collection (my favorite for pantries), or purchasing extras of whichever you pick.

Oliver’s room, using Easy Track Towers but Home Depot Shelving. Baskets from target, and I am so glad I bought extras!

Hallway closet when I first set it up. These bins are far from glamorous, but they’re incredibly functional for our needs!

Our original kitchen pantry, before we built out a bigger one. Using Sterilite Ultra Bins, which have scaled great!